Welcome to the "how-to" for submitting content to the CDCDA website as well as building and editing your club pages.
Submitting Content to The CDCDA Website

Step by step instructions to upload your material to the CDCDA website
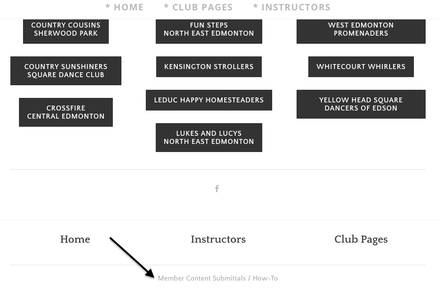
- Hit the blue CLUB button at the top of the CDCDA website home page (www.communitydance.org)
- At the very bottom of the page click the Member Content Submittals Tab.
- Click on the appropriate box for the event or announcement that you would like to add to the website.
- Fill in all the boxes with your info. Any box marked with a red * is a required field.
- To upload your poster or pictures click on the Choose File tab in the first box under Poster or Pictures.
- Clicking the Choose File tab will open a place on your computer where you can find your documents/poster/picture. Click the document you wish to add and select the Open/Choose button, it will upload to the box.
- To add another poster/document follow step 6 again but pick the next available box. Each poster/document must be in a separate box, (1 of 5, 2 of 5, etc.)
- Once your information is completed and posters/pictures/files are uploaded hit the black SUBMIT box.
- You’re done! We will take care of the rest. Changes may take up to 48 hours to appear.
Building & Editing Your Club Pages
I hope in these few instructions you will be able to find confidence to continue editing and making your club pages more personable and relevant. Having a strong online presence will provide your club the ability to reach unlimited groups of people with the potential of new visitors or dancers. Together we can all accomplish more and continue building a strong dance community online.
Step 1: Login
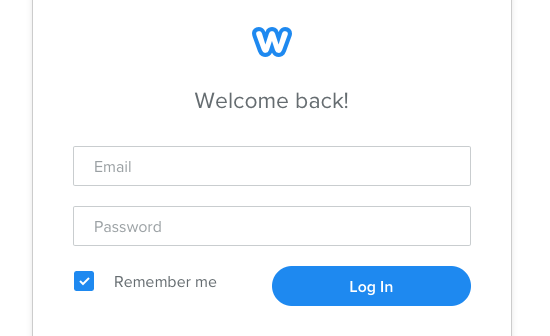
Each club has one designated webmaster who has access to login to Weebly in order to make changes to their clubs pages.
Please ensure this login and password is passed on to the next webmaster with resignation of the last.
Please ensure this login and password is passed on to the next webmaster with resignation of the last.
Step 2: Select From The Top Tabs "Build" or "Pages"
The two tabs at the top that we will be using are the "BUILD" tab and "PAGES" tab.
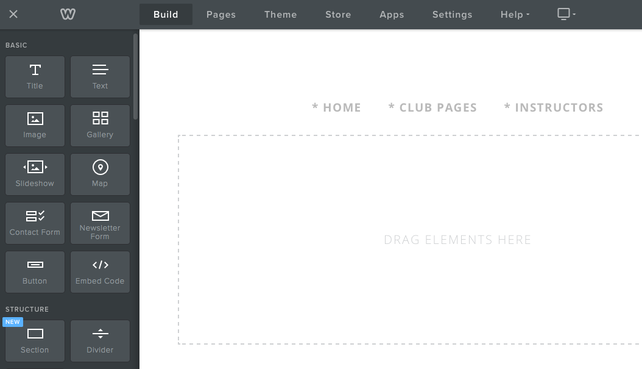
Build Tab - Displays the drag and drop build items on the left side that can be inserted into a club page on the right.
Pages Tab - Allows you to navigate between your club pages to select the one you wish to edit.
Build Tab - Displays the drag and drop build items on the left side that can be inserted into a club page on the right.
Pages Tab - Allows you to navigate between your club pages to select the one you wish to edit.
Build Tab

The picture on the left is showing the "Build" tab selected from the top tabs menu. All of the items on the left side can be dragged and dropped into the page shown on the right. (Currently the page has no content thus it is all white with text showing "Drag elements here")
The items that can be dragged and dropped into the pages are sorted into types of items: Basic, Structure, Media, Ecommerce & More) **Please do not use any Ecommerce functions.
All of the items are labeled and have a little icon to help you choose one.
The items that can be dragged and dropped into the pages are sorted into types of items: Basic, Structure, Media, Ecommerce & More) **Please do not use any Ecommerce functions.
All of the items are labeled and have a little icon to help you choose one.
Drag and Drop: In order to drag and drop an item, click and hold the button on your mouse or trackpad from the left sidebar and move it into the right side. You will see a blue line before releasing the click button which indicates where on the page it will place the item.
Remove Build Items: In order to remove an item that you have dragged and dropped into your page, simply hover your mouse over that item and click the "X" that appears in the top right corner.
Move Build Items: In order to move any items up, down or beside another item, hover your mouse over the item you want to move and select the bar that appears on the middle top of it. Click and hold to move the item. You will see a blue line appear where it will place the item when you release the click.
Pages Tab
When you click on the "PAGES" tab at the top between "Build" and "Theme", you will see a list appear that shows all of the club pages on the community dance website. You only have access to ones that are pertaining to your club. Scroll down until you see your clubs name and select the page you would like to edit. The "PAGES" tab is where you will navigate from editing one page to another. If you click on the name of your club from the list, it will take you to your clubs "HOME" page.
This "HOME" page is also known as the landing page.
After selecting the page to edit, it should bring you to the "BUILD" tab which was discussed above.
This "HOME" page is also known as the landing page.
After selecting the page to edit, it should bring you to the "BUILD" tab which was discussed above.


